Showing posts with label Recipe. Show all posts

Sunday, 2 February 2014

Mint Mania


Mint seems to have a life of its own here at our place. No sooner do I pull it out than it pops up somewhere else! When we first started the vegetable garden, I had visions of it happily filling the side garden (the one the first owners 'cleverly' hid all the building rubble under) as I knew it would grow where nothing else would! But I misjudged its tenacity by a long shot. It not only grew, but multiplied many times over and then decided it needed to travel further afield and started popping up in the container gardens. I tried to put a stop to this behaviour by pulling out the fast escaping tendrils but it was to no avail. In the end, the only solution was to rip it all up and institutionalize it....in other words, grow it in a pot from where it could not escape.

Mint escaping just prior to being pulled out.
It was also at this time that I realised that mint was actually a goldmine of a herb that I hadn't been utilising to the fullest extent. Every now and then it would find its way into a salad or jug of water  and when I was gently reminded, given to a Middle Eastern friend for his mint tea. But the vast majority just looked amazing, green and pretty, and eventually became food for grasshoppers who destroyed it before I destroyed them...and the whole cycle would start all over again.

Happily ensconced in pots

Enter the Internet and the amazing recipes of Donna Hay (she has become my latest food 'crush'). The recipe below is my main use for mint and along with Basil Pesto, has so many uses such as: dip, served tossed through pasta, spooned over vegetables, chicken or fish as they cook, on dry biscuits with sundried tomatoes and a slice of parmesan,  spooned over roast lamb as it cooks, drizzled over pizza, spread on sandwiches or plain old toast in the morning.... the list is endless. So, let's get started.


Mint and Pistachio Pesto

4 cups of mint leaves (I really 'pack' them in)
1/2 cup shelled pistachios
1 clove garlic
1 tbsp lemon juice
1 cup finely grated parmesan
1/2 cup olive oil ( I use more as I like it runnier)
black pepper and sea salt

Step One
Pick and wash leaves. Don't worry too much if they have been nibbled a little as the bugs will wash off in water and what they didn't eat should be fine


Step Two
Assemble all that you need before starting as there is nothing worse than thinking you have everything, only to find family ate the last of the cheese or the lemon is not a lemon afterall! (I freeze and then bag lemon juice when I have an oversupply so I always have juice available for any cooking needs)


Step Three
 Lightly toast the pistachios in a non stick pan


Step Four
Combine all ingredients in a food processor (I use my thermomix) and process until you have the desired consistency . Taste test and add more of any ingredient to suit.
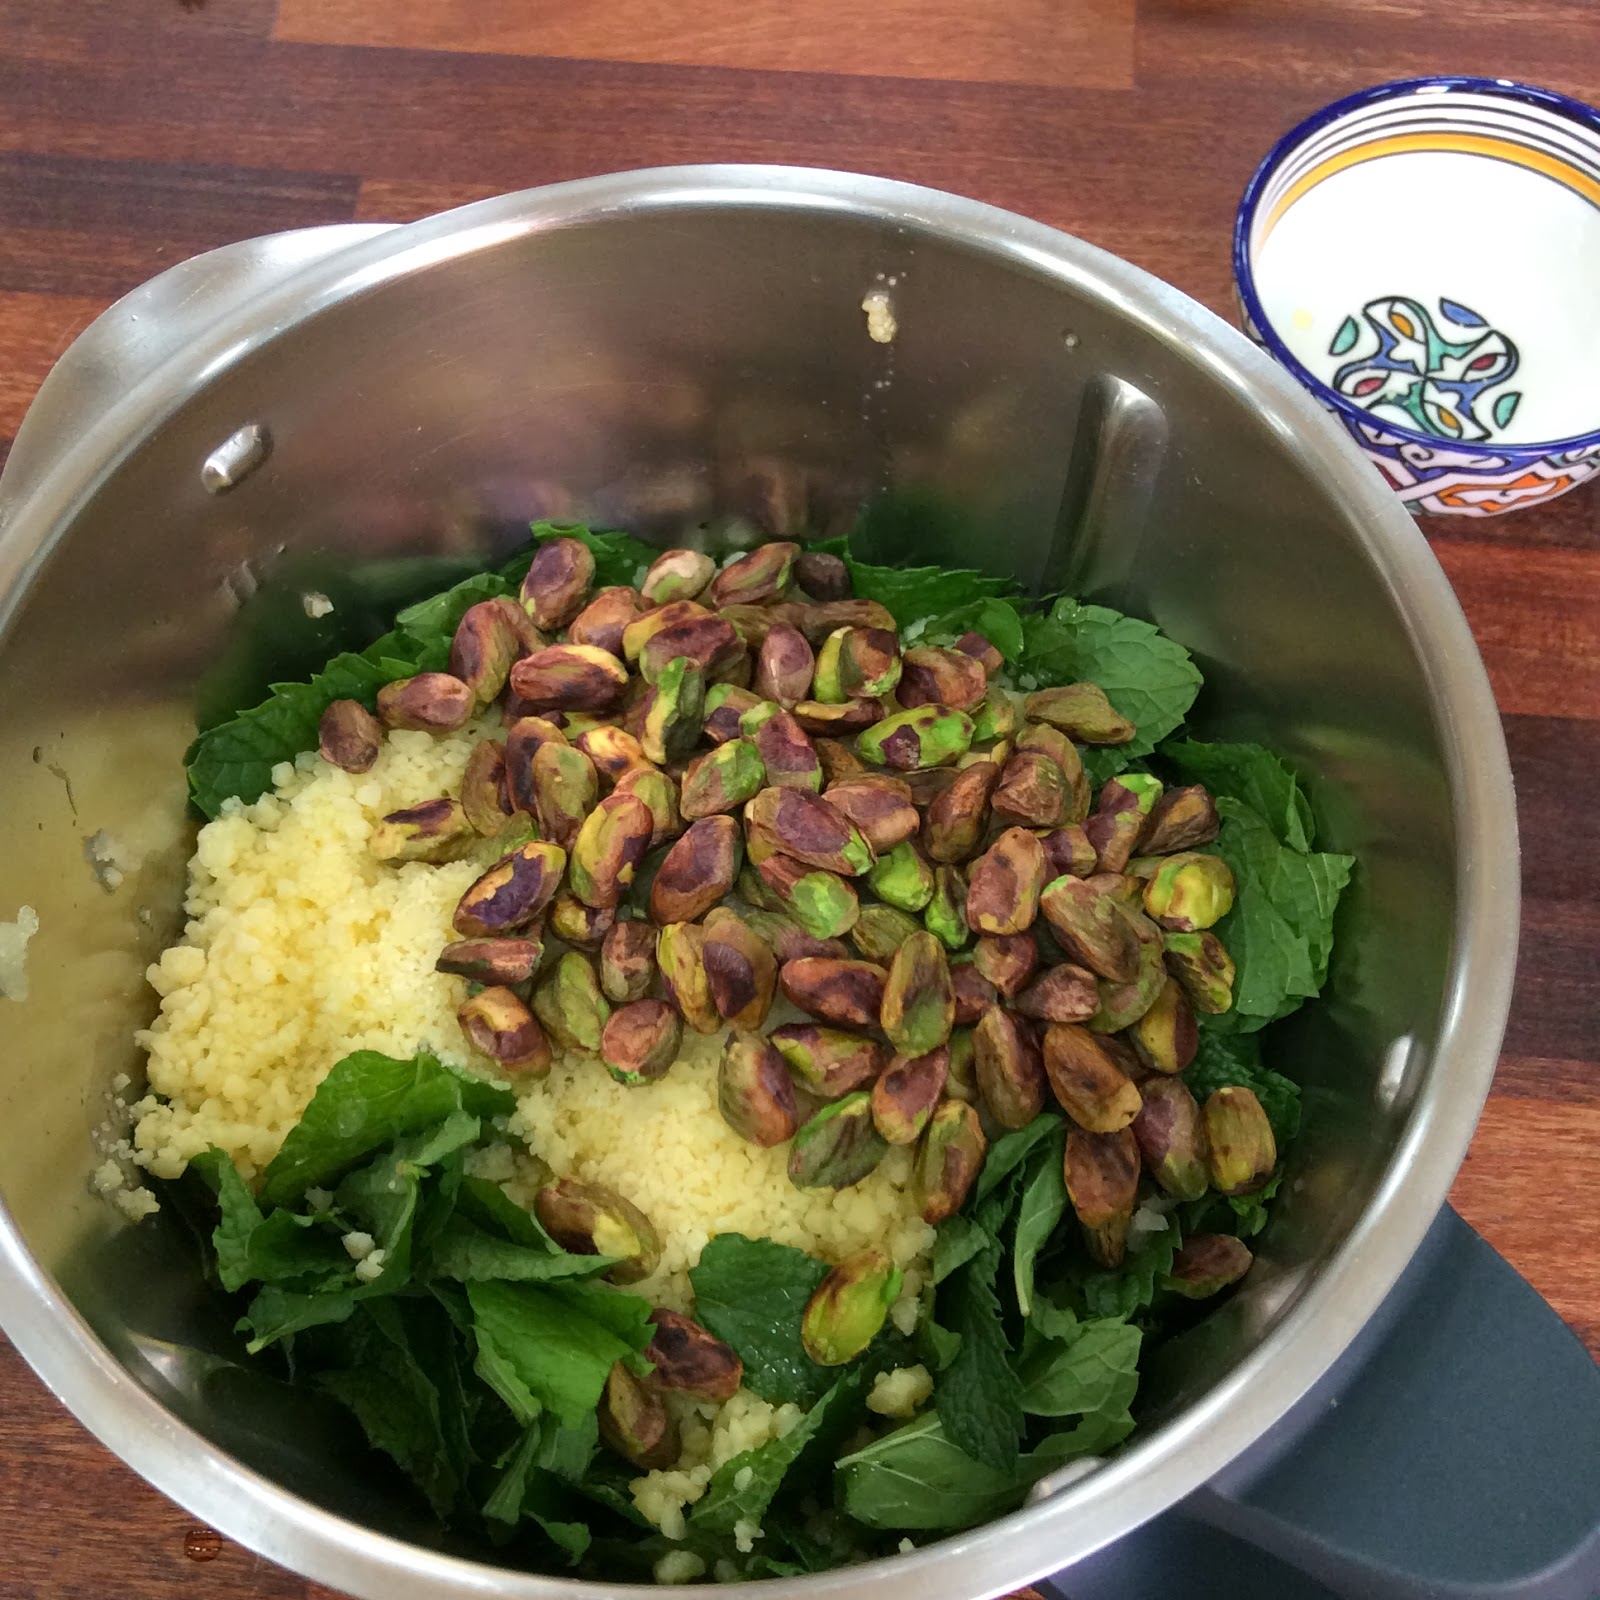

Step Five
Spoon into containers and place in the freezer or fridge (if in the fridge, use within 3-4 days and cover with a thin layer of oil ). Last time I made this, I ran out of containers so froze some in ice cube trays and then transfered them to small plastic bags. They are then easily thawed when needed.

Ready to freeze!

Monday, 25 February 2013

Breadcrumbed Zucchini

The inspiration for this recipe came from Donna Hay's 'Instant Entertaining'. You can use my amounts as a guide but most times I just use whatever I happen to have. I also throw in slices of squash and am thinking of using pumpkin as well!


Breadcrumbed Zucchini

1 large zucchini sliced lengthways (0.5cm to 1cm thick) or small ones sliced in half lengthways
1-1.5 cups of bread pieces from the inside of a loaf, roughly broken
80-100 grams parmesan cheese
1-2 tablespoons of chopped parsley
2-4 tablespoons of olive oil
salt and pepper to taste

Step One
Place sliced zucchini in a single layer in a baking dish (mine is non stick so no lining of oil or paper was used)


Step Two
Cover with thinly sliced parmesan cheese 


Step Three
Mix bread pieces, parsley and salt and pepper together and scatter over the cheese


Step Four
Drizzle with olive oil


Step Five
Bake in a moderate oven (180 Celsius) for 30 minutes or browned on top. Serve hot.


Thursday, 7 February 2013

Zucchini Slice Recipe

 I am picking a zucchini almost daily so in order to keep my family interested in eating them, I need to come up with tasty recipes. This latest one is a combination of many on the internet and I have just about got it the way I like it!


Zucchini Slice

400g zucchini
1 brown onion
100-150g bacon
2 tablespoons butter
90g grated parmesan cheese
1/2 cup self raising flour (I use gluten free)
5 eggs
salt and pepper to taste

Makes one 20x20cm dish. Serves 4-6
NB. My pictures show the recipe doubled due to an excess amount of zucchinis in the garden!


Step One
Peel and chop onion and place in a pan with the butter. Fry for a few minutes until translucent and then add chopped bacon and cook for another two minutes.


Step Two
Spread onto a plate to cool and place in the refrigerator.
Grate the unpeeled zucchini.


Step Three
In a separate bowl, lightly beat the eggs. In this recipe I have doubled the whole mixture although I was one egg short. Having larger than usual eggs, it made no difference.

Step Four
Add eggs to the zucchini mixture (you may like to squeeze a little of the excess moisture from it first) and then stir in the flour.


Step Five
Now add the eggs, cheese (reserve a little for the topping) and bacon/onion mix as well as salt and pepper. 


Step Six
Place in a lined dish and pop in the oven for roughly 30 minutes on 180 Celsius. I use fan forced. My double mixture took two dishes, each about 20cm x 20cm.


Perfecto!


Friday, 11 January 2013

The Sweet Smell of Basil

My freezer is never as full as in summer and the main cause of this is a multitude of different sized containers full of of Basil Pesto. Basil loves the warmer temperatures and the moment my tomatoes go in, so does the basil. Planting it too early has seen some plants die as they really don't enjoy the cold. Last year, when I realised this, I managed to save a few seedlings by cutting the tops and bottoms from plastic drink containers and placing them around the plants to give more warmth.

The young basil plants are also a magnet for slugs and snails so I crush eggshells and place a protective ring around them - not pleasant for the slippery creatures to get across! Sawdust should do a similar job although I am not sure how beneficial it is in the garden. When we first put our raised beds in, we surrounded them with sawdust but the minuscule 'neat' part of my personality couldn't stand how it was tramped through the house and onto paths. It did keep the snails at bay but nowadays I find keep a vigilant eye does just as well.


I have read that basil repels flies and mosquitoes so that might explain my lack of bites in the evening. Think about planting in a pot and having near entertainment areas (as long as it gets plenty of daily sun).

As the basil grows, pinch out any flowers in order to promote growth and once you have a few cupfuls of leaves, it is time to make pesto. Cut the stems regularly and the plants will continue to grow throughout summer and you will have a steady supply for the recipe below!

 Basil Pesto

Picked, ready to wash, de-stalk and spin dry.


2 cups fairly tightly packed basil leaves
1 cup good quality olive oil
4 garlic cloves
1 cup grated parmesan

( In order to make this economical, I leave out the pine nuts that usually go in pesto as they are quite expensive.)

In a food processor, finely chop the basil leaves and garlic. Then add the cheese and oil and buzz it again. I find that sometimes I use less or more oil depending on the quantity of leaves and whether I wish to use the pesto as a dip, spread or sauce. Mostly we use it as a sauce for pasta or zucchini spirals but it can be spread on biscuits and toast, used as a dip, spread over chicken before baking, drizzled warm over cooked vegetables or used in recipes that ask for pesto. I freeze mine for up to six months in small quantities.

Processed and ready to spoon into containers.

A double batch all ready to seal and freeze.


Friday, 4 January 2013

The Heat is On


As much as I look forward to summer vegetable growing, there is also that element of dread as I envisage the long hot days playing havoc with my plants. The last two weeks have been particularly bad with lettuce going to seed 'overnight' and tomatoes ripening too quickly for us to eat them all. 

This is the first year we have grown Costoluto Genovese

For the  last two years, I have made Green Tomato Chutney from my larger varieties such as Beefsteak and Grosse Lisse, while they were still green. However, I mixed some seeds up that I had kept and instead of planting plenty of large varieties this season, I have many small fruiting bushes such as Tommy Toe and Sweet Bite.  What to do, what to do….? 

One morning's pick
Sometimes my creative instincts take over!

Once again, I turned to the Internet to solve the problem of an abundance of tomatoes (even with 24 people here on Christmas Day, there are only so many tomatoes each individual can eat). As we consume plenty of pasta and the girls are quite partial to pizza, I decided to make  the most basic of pasta sauces/puree. Small tomato varieties are perfect for this as the fruit doesn’t need peeling and as long as the tomatoes have a nice taste, this recipe is fabulous! Frozen, the sauce can be thawed when needed and you can then add fresh herbs, garlic,mushrooms, olives etc and tailor it to what you need the sauce for. Last night when making pizzas, we ran out of commercial paste and as I had just cooked a batch of sauce, we used some of that.  I was told it was the best ‘paste’ they had ever used and how did I make it? I was stunned. I did nothing but grow, wash, zap in the Thermomix for a few seconds and simmer till the quantity was reduced by half. Looks like we will no longer be buying tomato paste! Check out the simple recipe 'Tomato Paste/Puree' below.

Tomato Paste/Puree

 Step 1
Place washed, diced tomatoes into a food processor making sure the 
stem area has been cut out. Blend until liquidised.


 Step 2
Place in a heavy based pan and bring to the boil.


 Step 3
Turn the heat down and simmer until the liquid is reduced by roughly half.

 
Step 4
Allow to cool and place in containers. Once they are cool, place lid on, label and store in freezer. According to notes on the Internet, they should be fine for up to 12 months. Once defrosted for use, add whatever herbs, spices, garlic, vegetables you desire.


On a brighter note, summer is fantastic for growing basil which loves being near tomatoes when growing and on the plate! To see my Basil Pesto recipe, click here. 


Unemployment is capitalism's way of getting you to plant a garden.  ~Orson Scott Card